Journal #16: It Takes a Trench
by Miles Raymer
In this lovely time of year when blossoms burst forth, new leaves unfurl, and plants reach for the sun with great zeal, gardeners have to think seriously about water. Up to this point, it’s been easy enough for Ma to water the garden by hand. But now that we’ve doubled our growing capacity, that strategy has become rather impractical; in another few weeks, every bed will be full of growing plants and it will take 2-3 hours to water it all. Even if we get sporadic rain throughout the summer, we’d still have to come out and water 2-3 times a week, perhaps more often depending on how dry it gets. So, in an effort to save time and conserve water, Ma and I are putting in a time-controlled drip irrigation system that will cover the old garden beds as well as the more recently constructed ones. This undertaking requires a fair amount of labor and money upfront, but will ultimately free us up to work on other projects this season and also in years to come.
I’m not familiar enough with irrigation to design and implement a system on my own–– especially one that works on a timer––so Ma and I invited a specialist out to take a look. The man we found is a very friendly guy named Randy, and he quickly devised a way to set up the irrigation lines in a pattern that requires the least amount of trenching. But given that our garden has become quite large, there is still a fairly extensive amount of digging to do. As with other projects since my return from Japan, I’m very fortunate to have the free time to do this work myself, which will drastically reduce the financial cost of the project. With all the trenching done, Randy should be able to set up the whole system in just one day. So after our meeting early last week, I got to work.
One of the most important rules for any garden project is to have the right tools, so Ma and I invested in a trenching shovel, which has a narrow blade that is just 4″ wide and 12″ long. Irrigation trenches don’t typically need to go beyond these dimensions, so buying the shovel was a great way to ensure that it would be easy for me to make sure I was consistently digging at the proper width and depth. It took five days of hard work to complete all the trenching, but spread over two weeks it didn’t feel overly demanding. Below are the day-by-day photos of my progress.
End of day one:
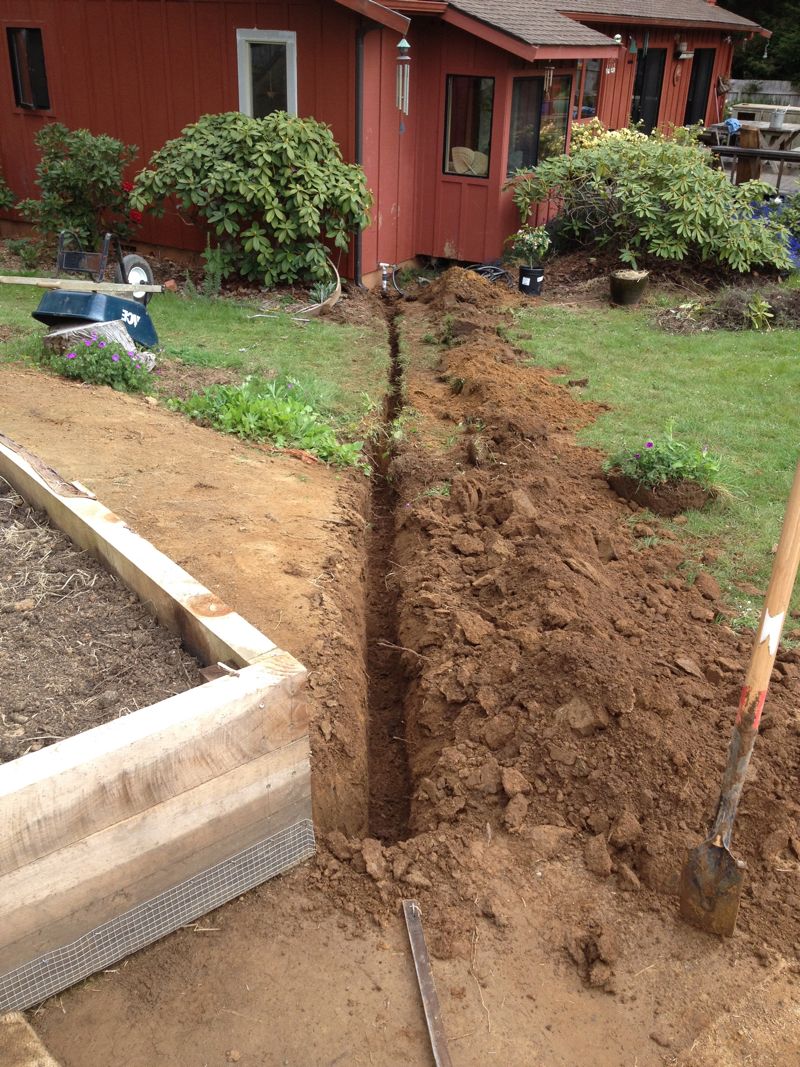
This trench begins at the water source next to the house and runs to the corner of the nearest bed
It then continues diagonally the the corner of the next nearest bed
End of day two:
Running the water along the edge of the beds allow for easy access
Turning the corner to reach the last bed in the new garden
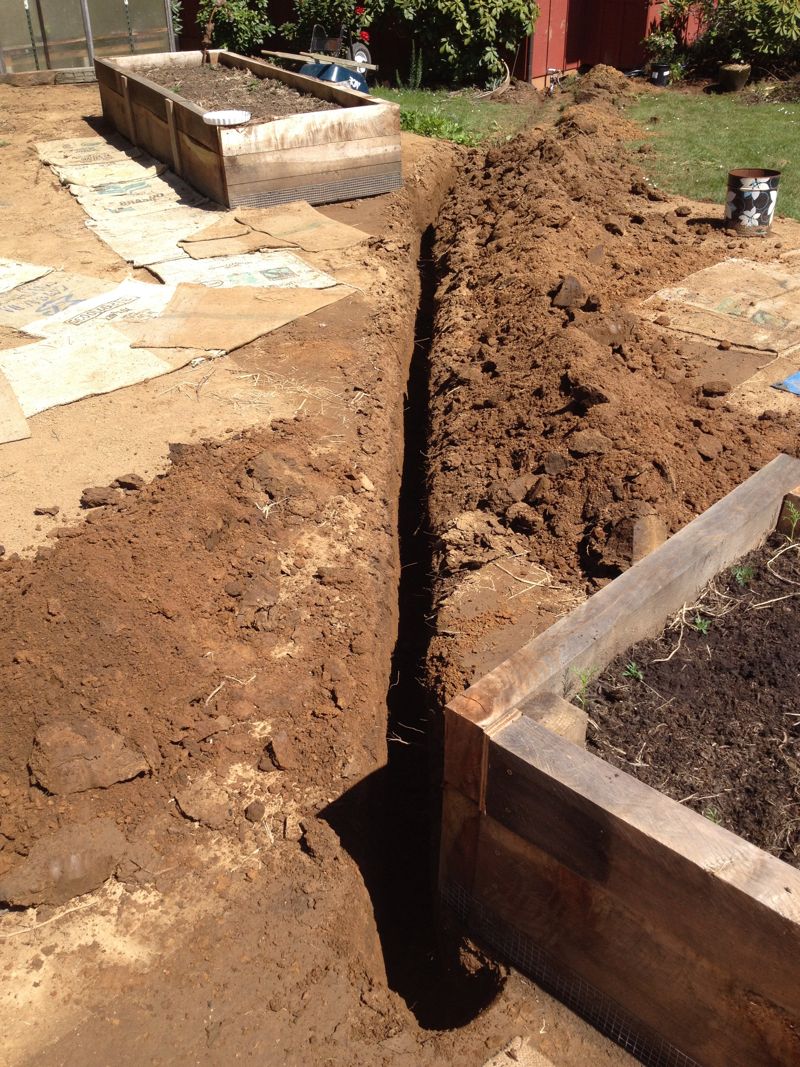
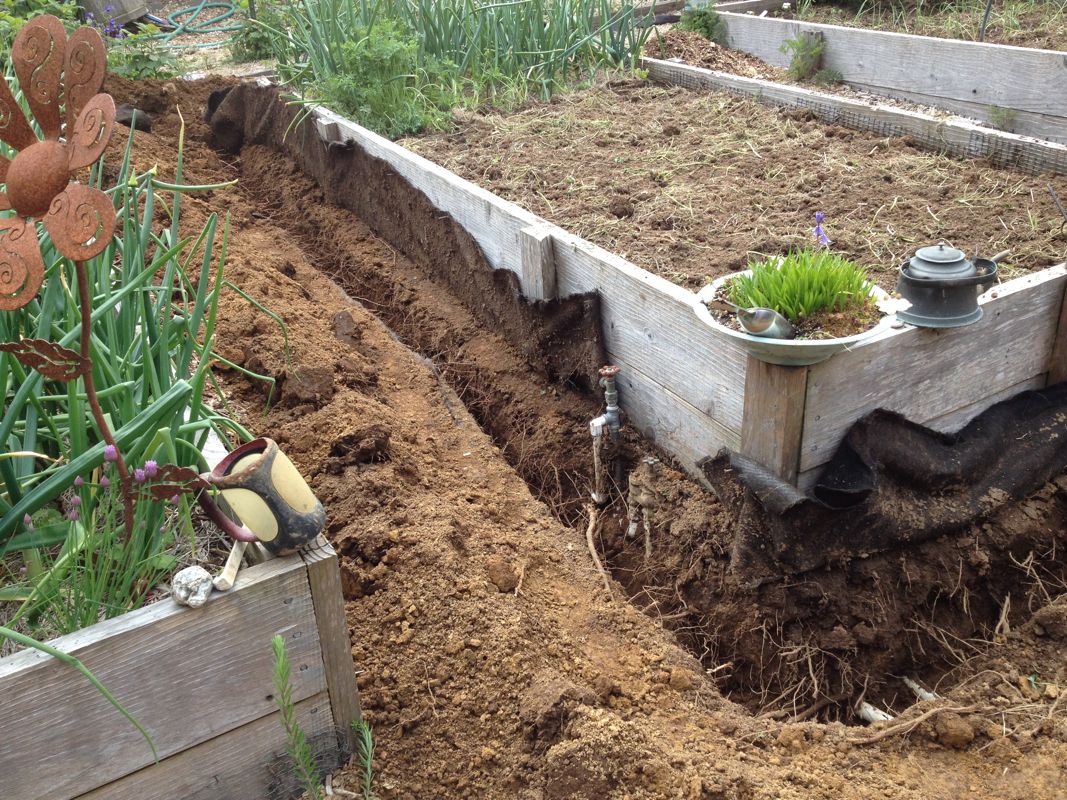
End of day three:
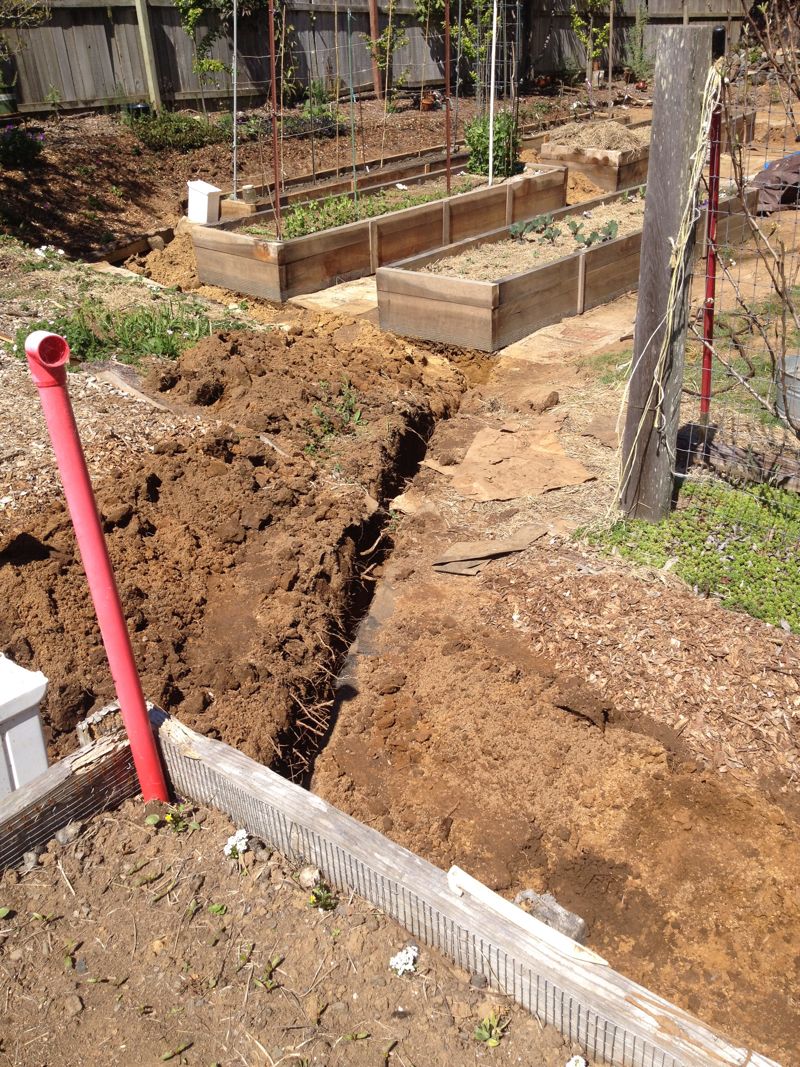
Up into the old garden
Moving toward an already-existing faucet
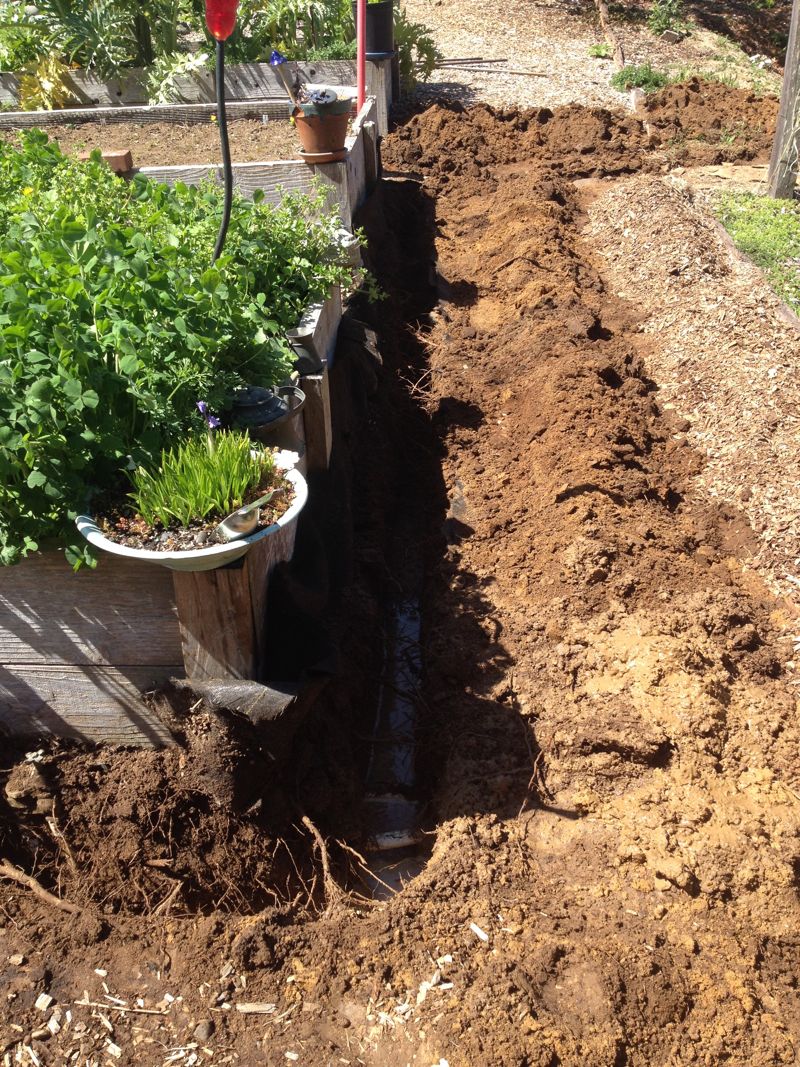
Oops!
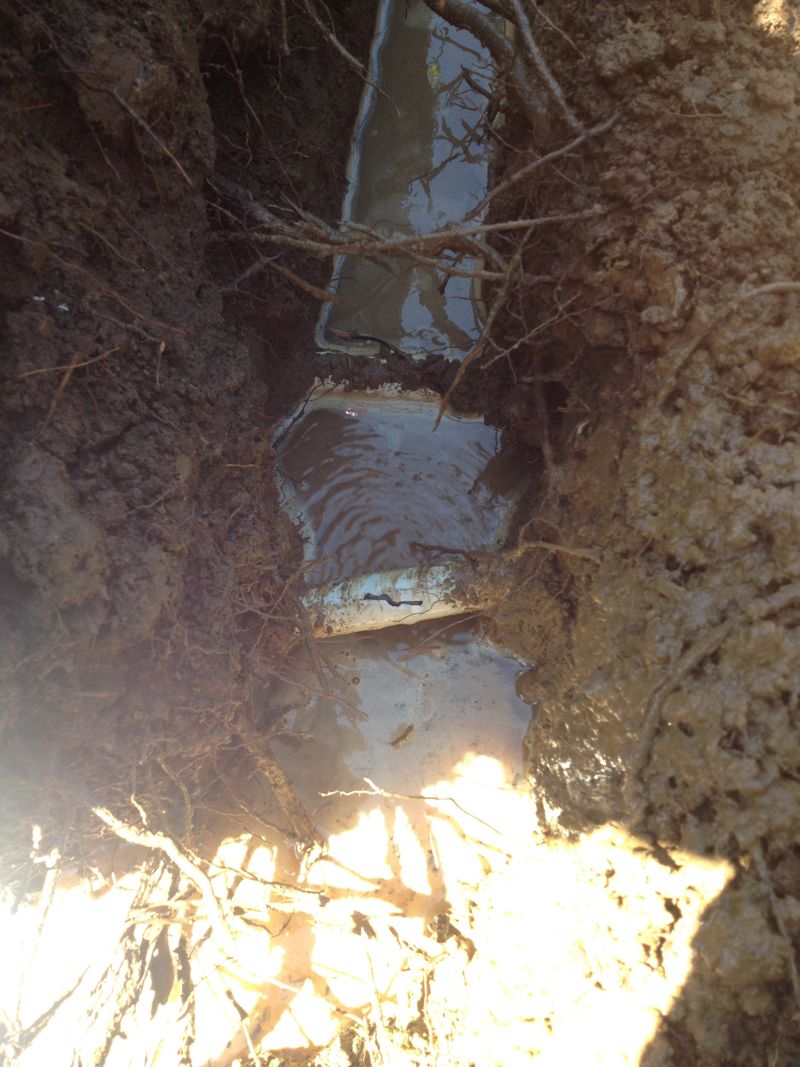
As you can see, I accidentally busted the active water line that already comes out to the old garden. I knew I was going to run into it at some point, but it ended up being about 6″-12″ farther west than I’d anticipated, so I wasn’t being careful with my digging at that point. After I got over the frustration from my carelessness, I was able to absorb the takeaway lesson: pipes aren’t always located exactly where you think, so it’s best to proceed with caution when excavating anywhere close to a place you suspect water lines.
Fortunately, I was able to shut off the flow to that line, which didn’t result in too much wasted water. Unfortunately, our shutoff valve was a plastic mess, and it began to leak quite a lot of water, which meant we needed to get a plumber to come out and fix it so we didn’t have to keep the house water shut off for too long. On a Saturday afternoon, the only available emergency plumber was Billy from Roto-Rooter, who did a great job of pulling everything out and replacing the plastic with copper, including a proper shutoff. He also installed a capped opening that will easily connect to our new irrigation line.
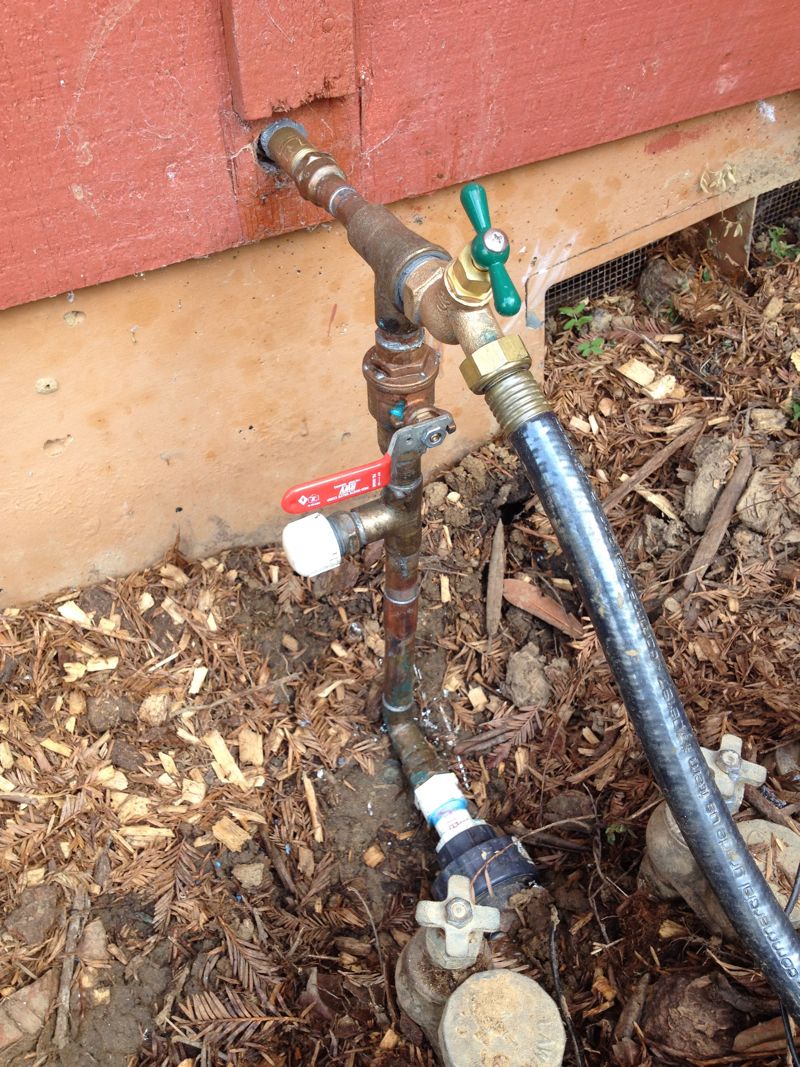
Billy’s excellent work
Due to some unanticipated complications, Billy stayed at our house until well after dark on Saturday until he was sure we’d be able to turn our water back on without significant leaking. He had to come back on Monday to complete a few finishing touches, but we were extremely grateful for his work on Saturday. It cost us more than we’d have liked (plumbing always does), but the plastic shutoff we had before wasn’t at all suitable, so it’s a problem we would have had to deal with sooner or later. Better to put in a fully functioning shutoff before installing the new irrigation lines. With this small crisis over, I was able to complete the trenching. I managed not to break any more water lines.
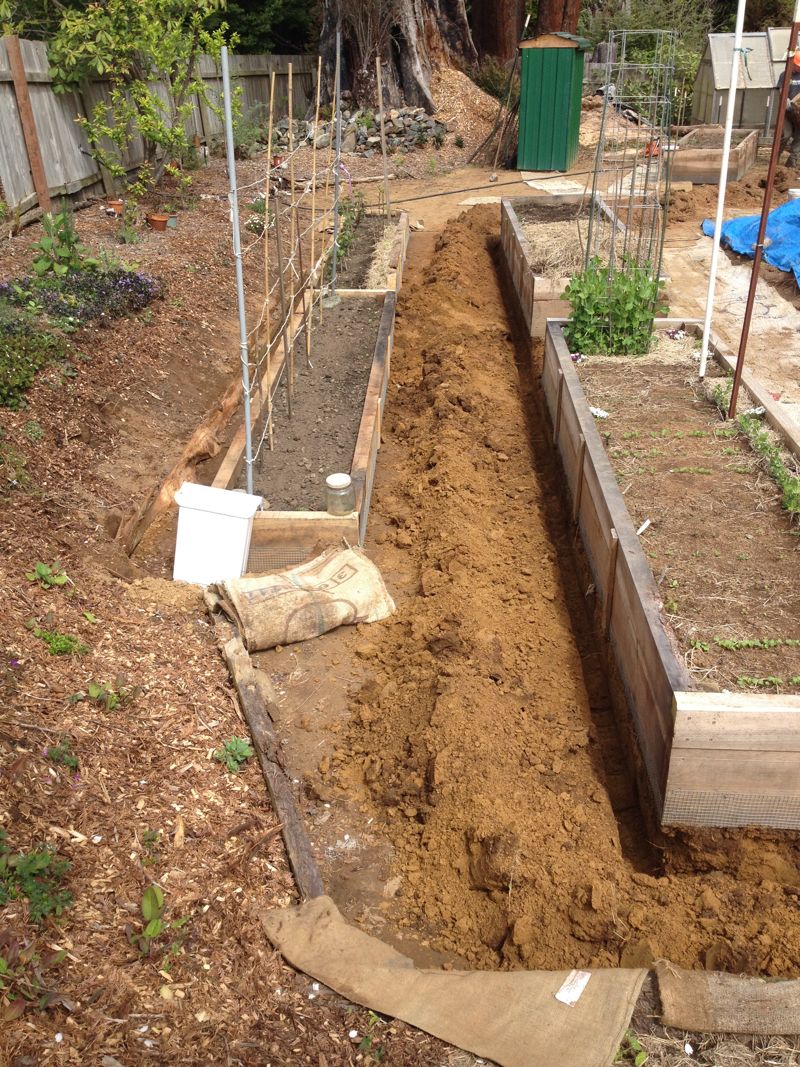
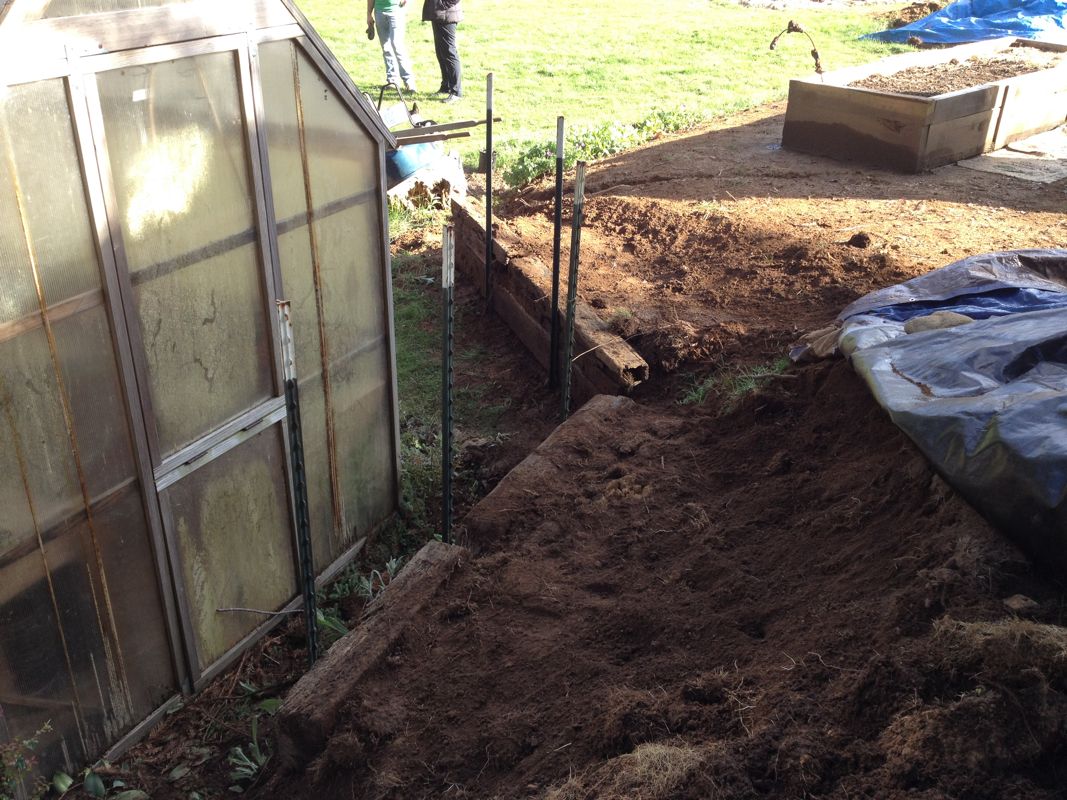
End of day four:
This faucet will feed the main water line that will run along all the beds
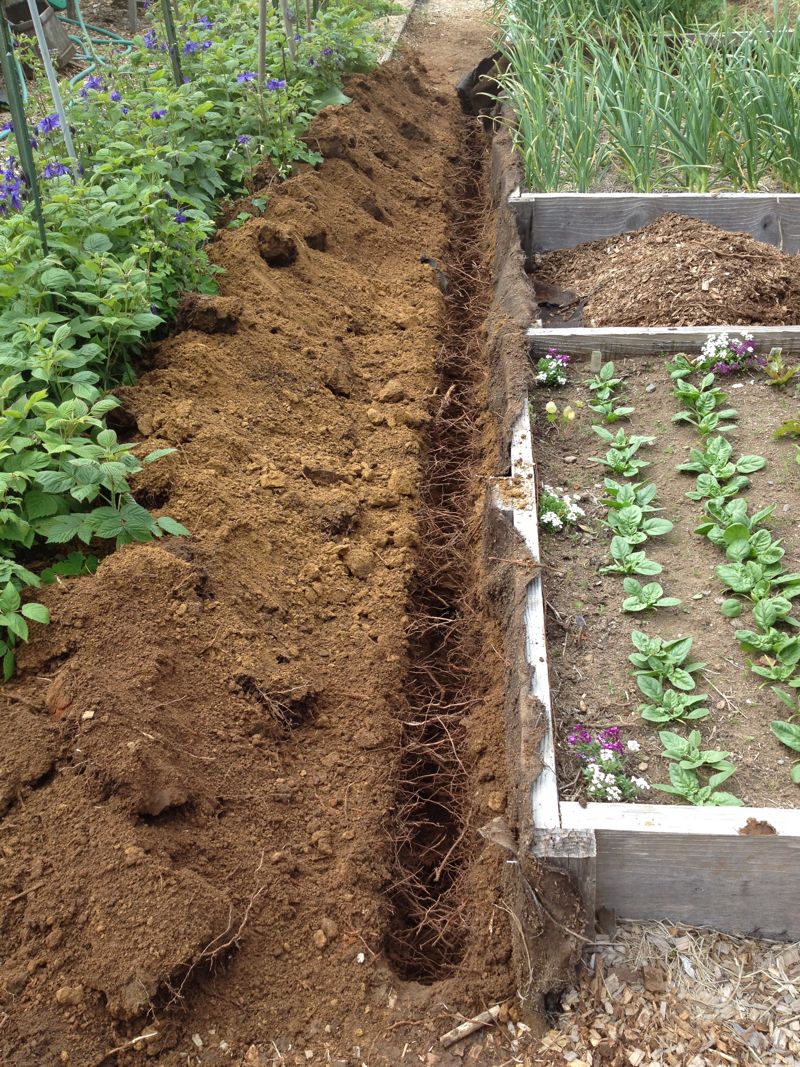
Running a single trench along the narrow edges creates access to each individual bed
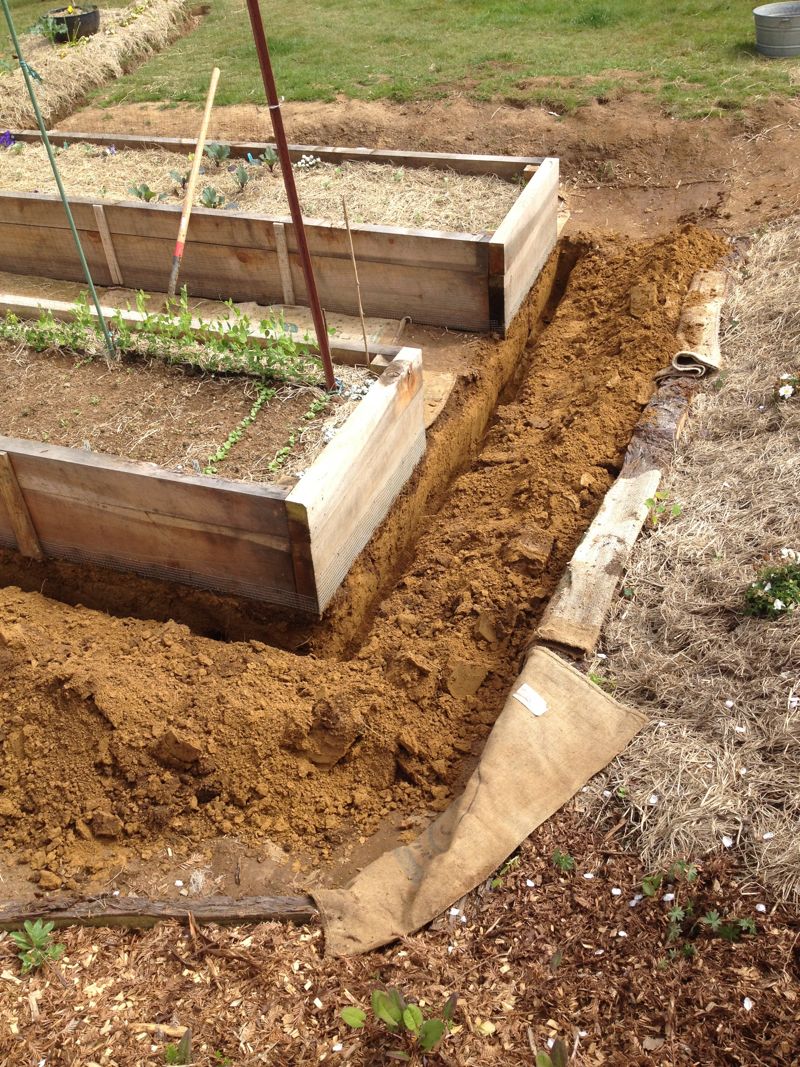
End of day five:
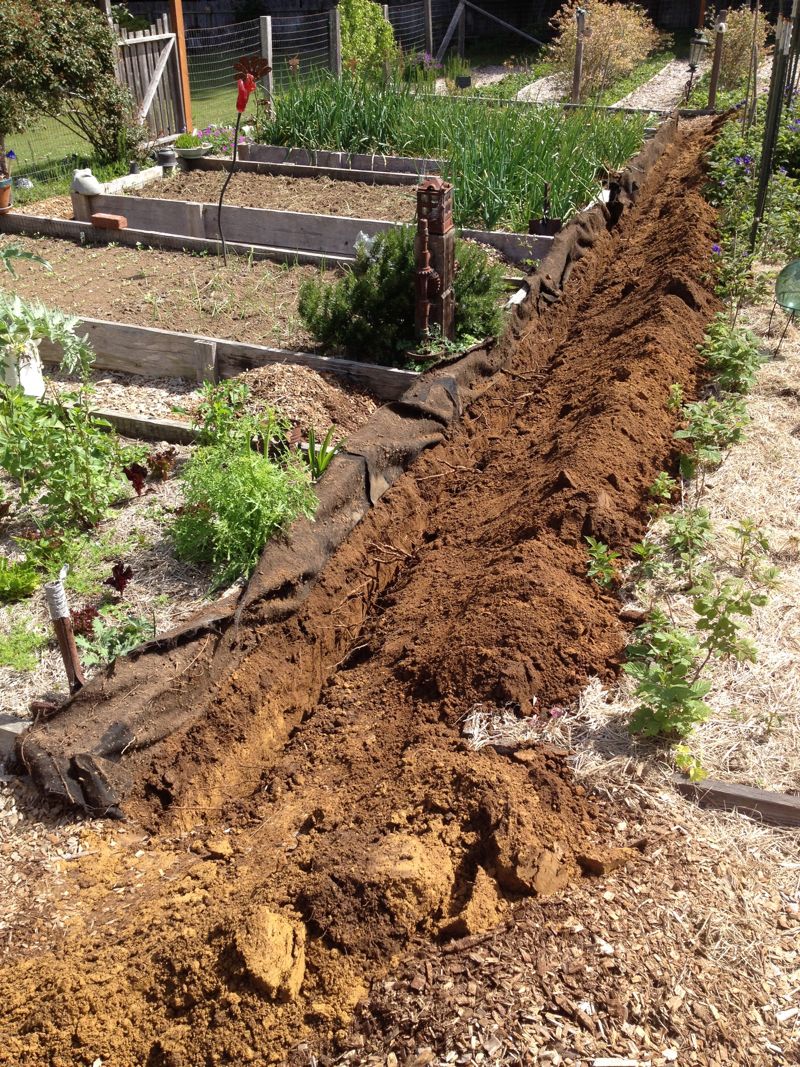
All done!
As shown in some of the pictures, I was able to cut through the weed mat that covers the garden paths and nail it up against the beds. That way, I’ll be able to stake it down again after the trenches are filled in, thereby retaining as much weed-suppression power as possible. We won’t be installing the system until the 29th of this month, but my understanding is that each bed will have a single pipe that comes out of the ground line. Each of these lines will have its own small shutoff so we can choose exactly which beds we want to irrigate at any given time. A main hose will connect to ground line and run the length of the bed, and small drip lines will be attached to it in whatever configuration we choose. I imagine it will take quite a bit of effort to set up properly, but doing so should save us a lot of time and energy as we move into summer. I’m really looking forward to completing the project, especially learning how to hook up and control the timers.
Another easy way to conserve water is to mulch. Ma and I use rice straw for this task. It’s a great way to help the soil retain water, but the downside is that I’ve found that the straw can attract hungry bugs who want to eat my plants, especially slugs. I’ve been wary about mulching too early because I want the veggies to be established enough to survive moderate munching, but this week I decided my bed of lettuce, kale, and spinach was ready.
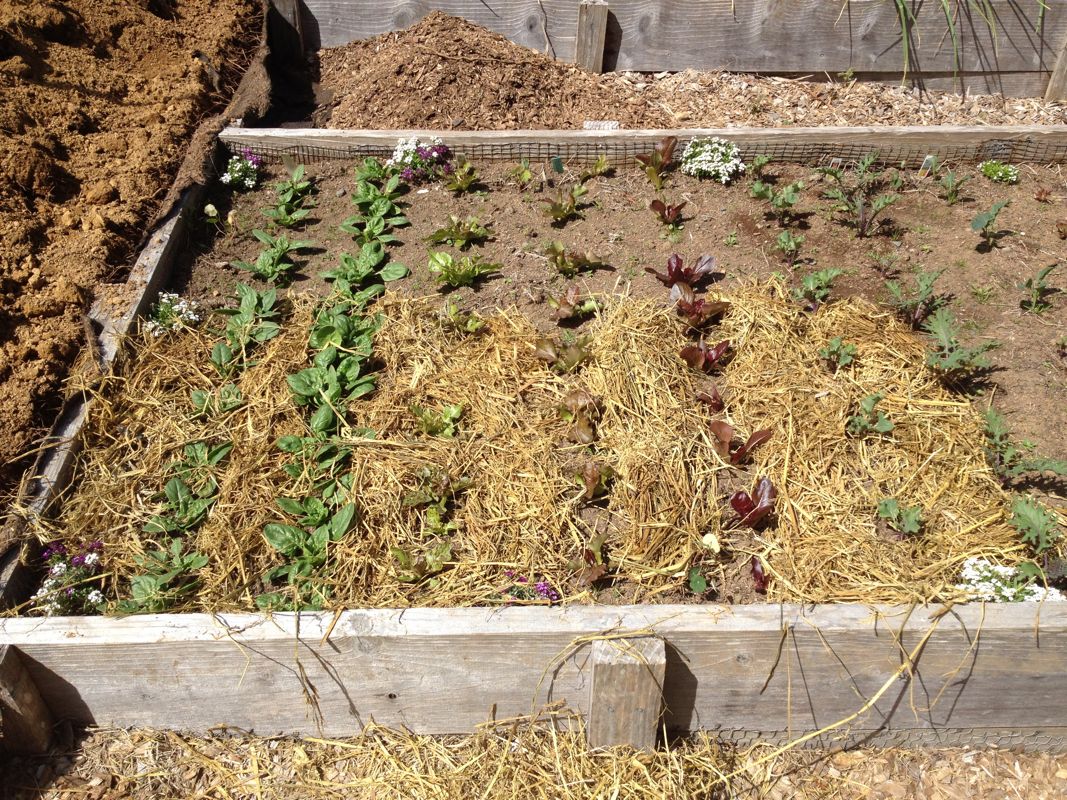
Rice straw shields soil from the hot sun, keeping it moist, and also decays into the bed over time, adding nutrients
I’ve also been working on a host of other small projects, including a small retaining wall at the edge of the new garden space. There are some slightly steep edges of unstable soil that could potentially slide into our greenhouse, so Ma wanted to make sure that couldn’t happen. Jesse Re came over one afternoon to show me how to use metal fence stakes and some of our old railroad ties to build a sturdy enough wall. The key is to pack earth as tightly as possible against the wall once it’s in place, which lessens the chance of erosion and provides increased stability.
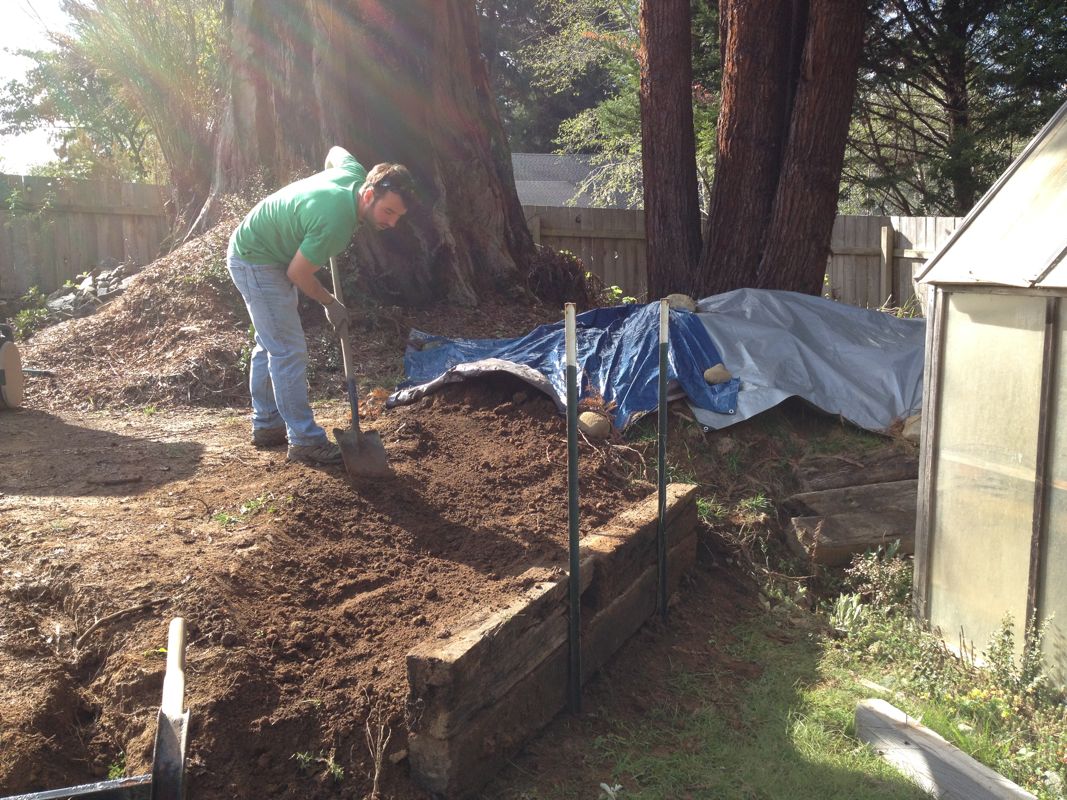
Jesse shoveling dirt to reinforce the new retaining wall
Greenhouse should be protected now
Ma and I also went to the Saturday Farmers’ Market in Arcata last weekend to pick up some tomatoes from Laura at Flying Blue Dog nursery, which is located in Willow Creek. I contacted Laura after Shail recommended her tomatoes a couple weeks ago. When we arrived at the market, Laura gave Ma and I a quick but extremely informative tutorial on how to effectively grow tomatoes on the Humboldt Coast. The key is to harvest as many tomatoes as possible before the plants begin to mold, a process that Laura claims is unavoidable. The safe cutoff to harvest is 65 days or less, so Ma and I choose a few different varieties that should bear fruit within that time-frame. To experiment, we put four plants in pots against the wall of the house, two in the greenhouse, and one in our indoor sunroom. I’m really looking forward to comparing their growth and production rates so I can devise ways to have even better tomatoes next year.
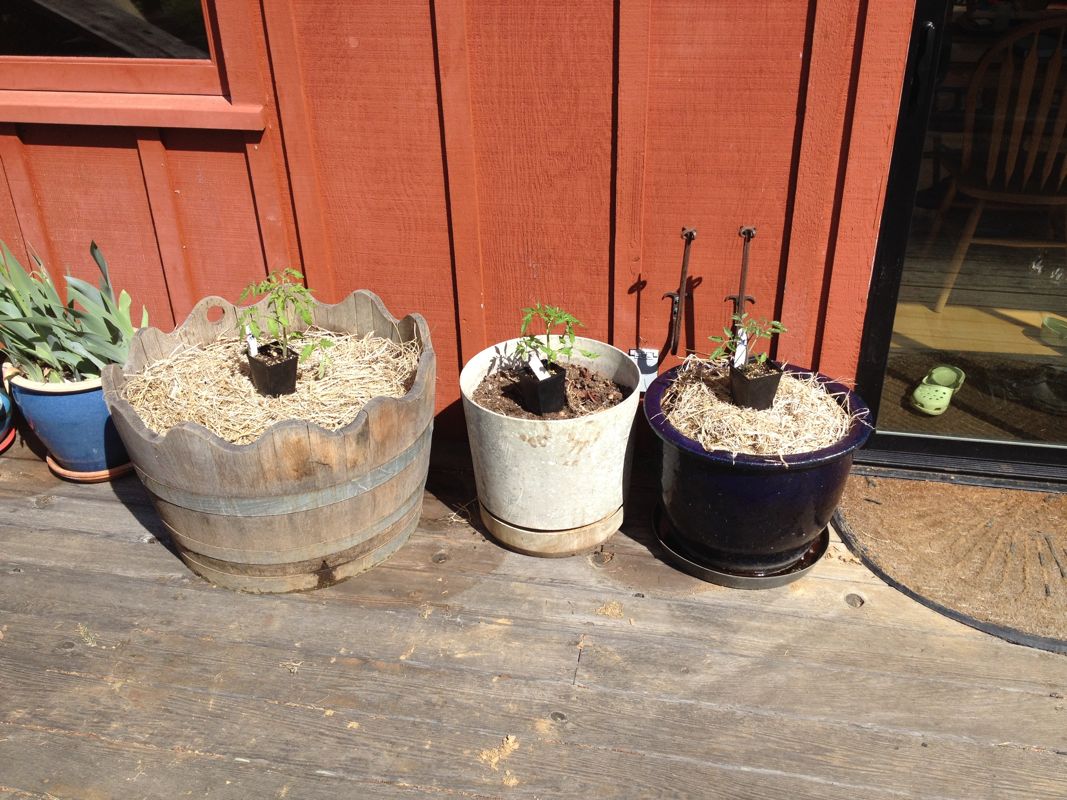
We put these three varieties close to our south-facing wall, which should absorb heat and help the tomatoes thrive
Jessie and I are heading to San Francisco tomorrow to visit some friends, and then flying to Spokane for a spring break visit with her dad’s family. It’ll be nice to take a short vacation, but I will miss my daily garden routines. Good thing there will be lots to do when I return!
So I use a fine mulch – Garden Bloome soil builder on my flower beds close to the house – This year I’m using on the veg. garden too because of the lack of rain. I also use Sluggo – been a veg saver! Looks like a major project but it will pay off – I love my irrigation system – crude as it is.
Thanks for the comment! We use Sluggo too, with varying success. It’s certainly better than nothing.
[...] with my friend Jesse when we busted this irrigation pipe (yes, the same pipe I busted in back in Journal #16, but in a different and––in my defense––rather unpredictable spot!). Jesse, a middle [...]