Journal #44: To Build a Greenhouse
by Miles Raymer
Next month, Ma and I will be installing something we’ve wanted ever since I took the permaculture design course at the Occidental Arts and Ecology Center: rainwater catchment. Ma’s been looking into it on and off for months, and we finally found a guy through a friend who pitched us a simple design for a fair price. He’s also going to let me help him install the system, so I’ll know how it works. That project should be done in early June (just in time for rainy season!).
Given the current drought and future concerns about water security, rainwater catchment is a critical component of making our garden a more sustainable and environmentally-friendly operation. Plus, it’s just a really cool way to turn water runoff into a productive resource.
It turns out that the best place to put the catchment tank is exactly where our old greenhouse is. We’ve wanted to replace that greenhouse for quite some time, so we figured this was it. Way back when we first designed the new garden, we knew we eventually wanted a new 8’x12′ greenhouse, so we left a spot roughly that size in a part of the garden with good sun exposure.
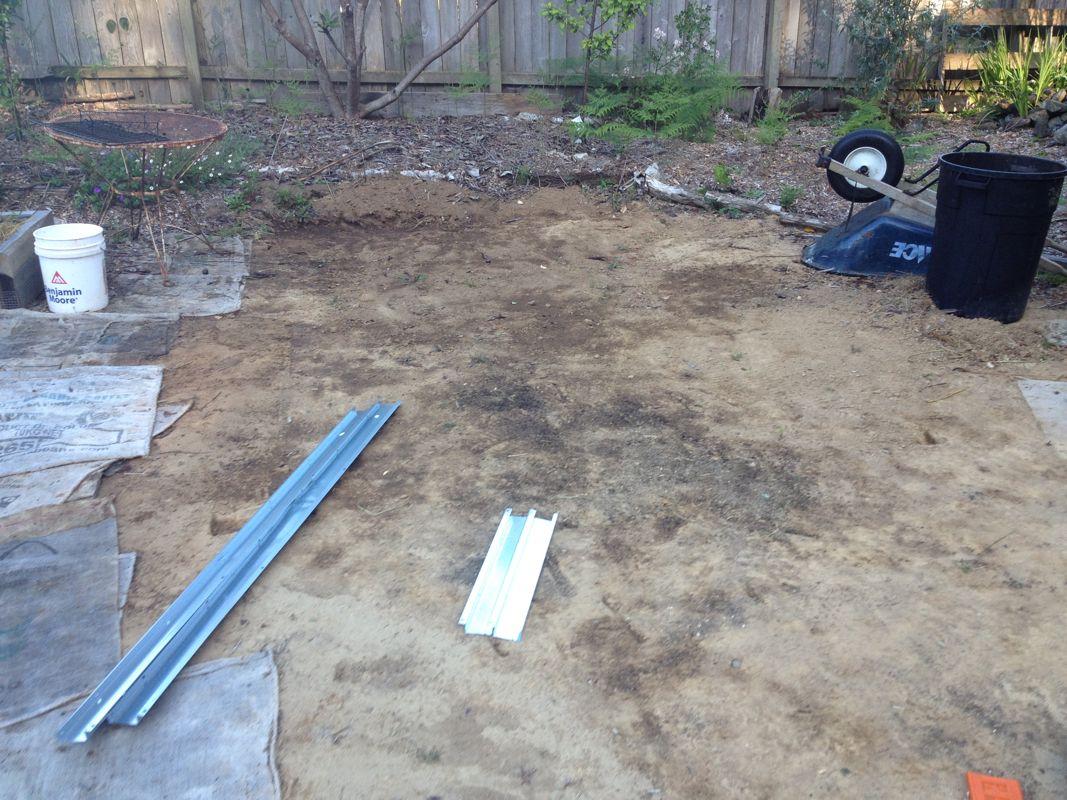
Spot for new greenhouse
Now that foresight is about to pay off. Ma ordered an 8’x12′ Palram greenhouse, one with good customer reviews and a reasonable price as far as prefab greenhouses go (about $1,000). When the two huge boxes arrived, I was intimidated by how many different parts and components there were! I felt that perhaps my scant building experience hadn’t quite prepared me to do this sort of project completely on my own, and I spent a day or two wallowing in petulant chagrin (as is my custom). But, as I eventually learned when I got over myself, “building” a prefab greenhouse doesn’t require much actual building. It’s more a process of careful assembly.
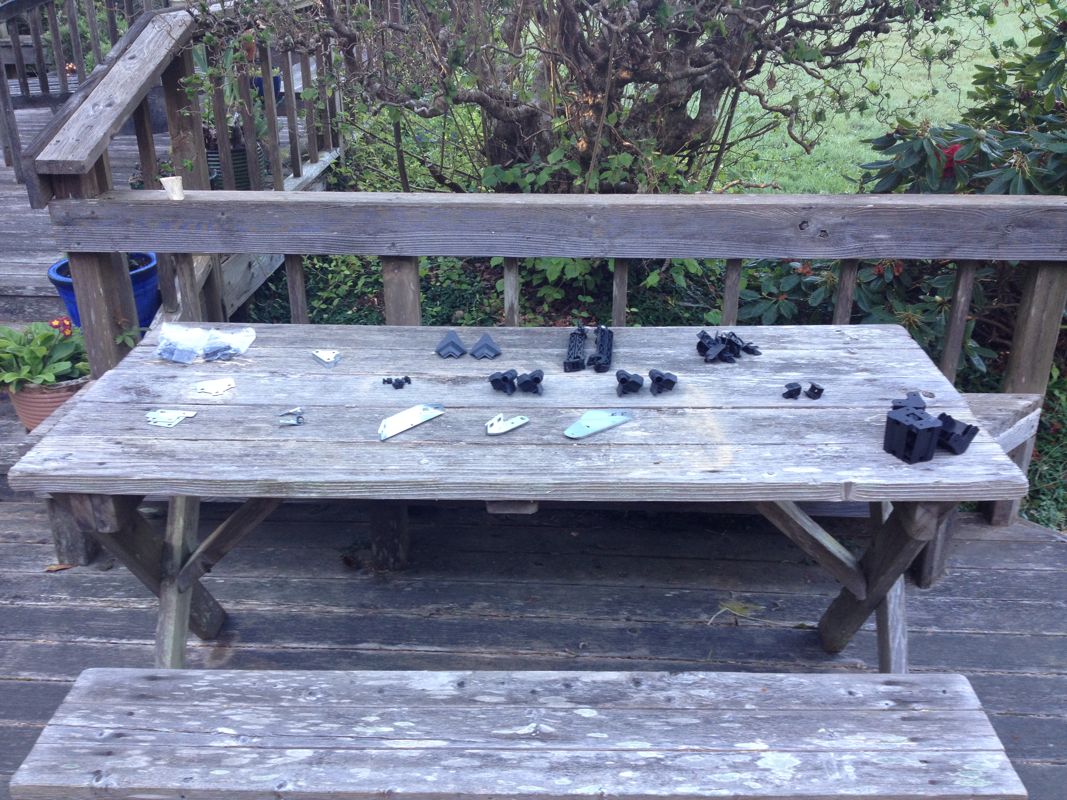
That’s not to say my building experience didn’t come in handy. The first thing I did was what any good builder would do (and also what the instructions suggested): take a thorough inventory.
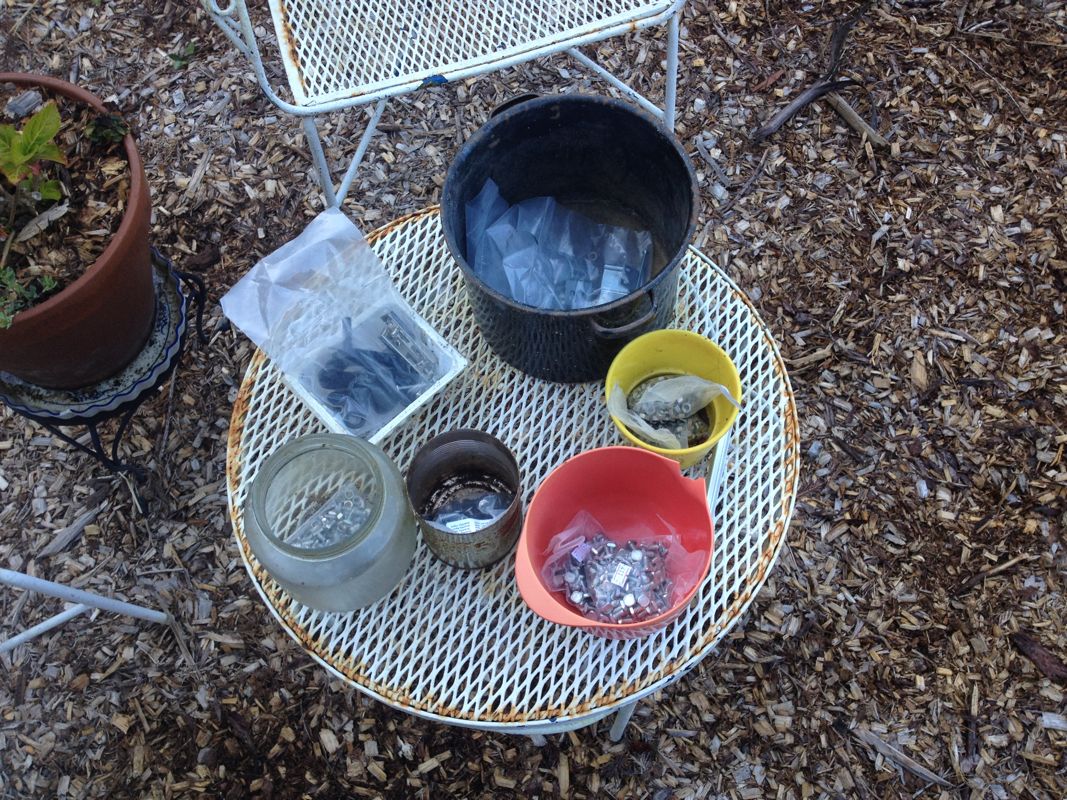
All nuts, bolts, screws, and other doodads accounted for, and separated into containers
Additional doodads, laid out for easy access
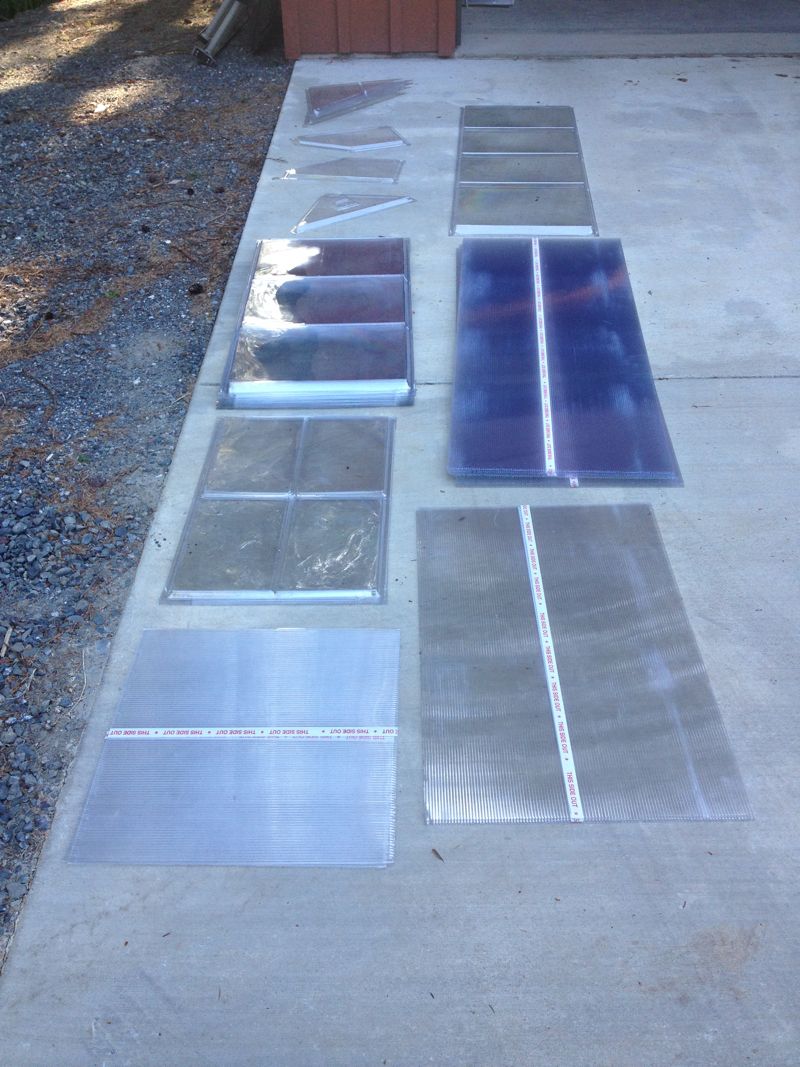
All polycarbonate panels laid out together
According to Palram, polycarbonate is a glasslike, flexible, and virtually indestructible polymer. It’s used for making fighter jet cockpits and stadiums, and can also be run over by a car and come out just fine. At one point during assembly, I fell off a stump I’d been standing on and accidentally kicked one of the panels partially out of the frame. I was terrified that I’d broken the panel and/or disfigured it so badly that I wouldn’t be able to get it back into position, but it was actually quite easy to bend back in place, and it suffered no permanent damage. Pretty sweet!
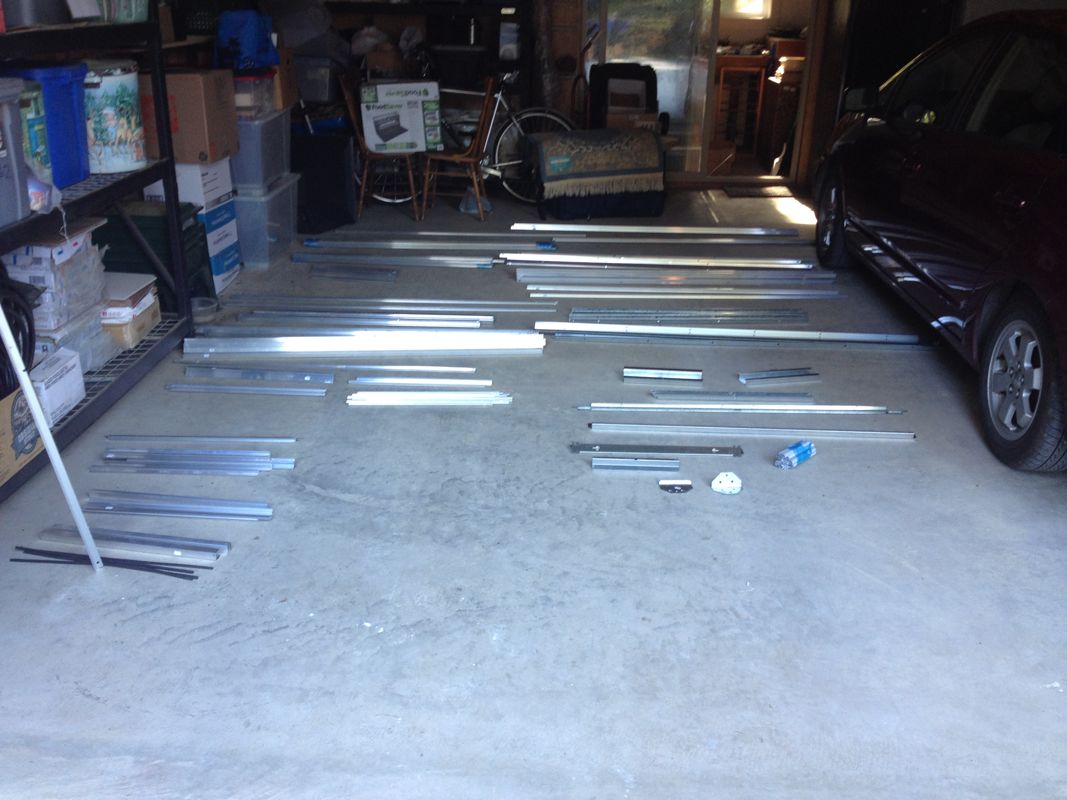
All framing components separated and accounted for
Given the strength of polycarbonate and Palram’s completely metal frame, this is a very sturdy greenhouse that hopefully will last a lot longer than our old one, which has a wood frame and less durable panels.
Once I got everything laid out, it was time to begin assembling.
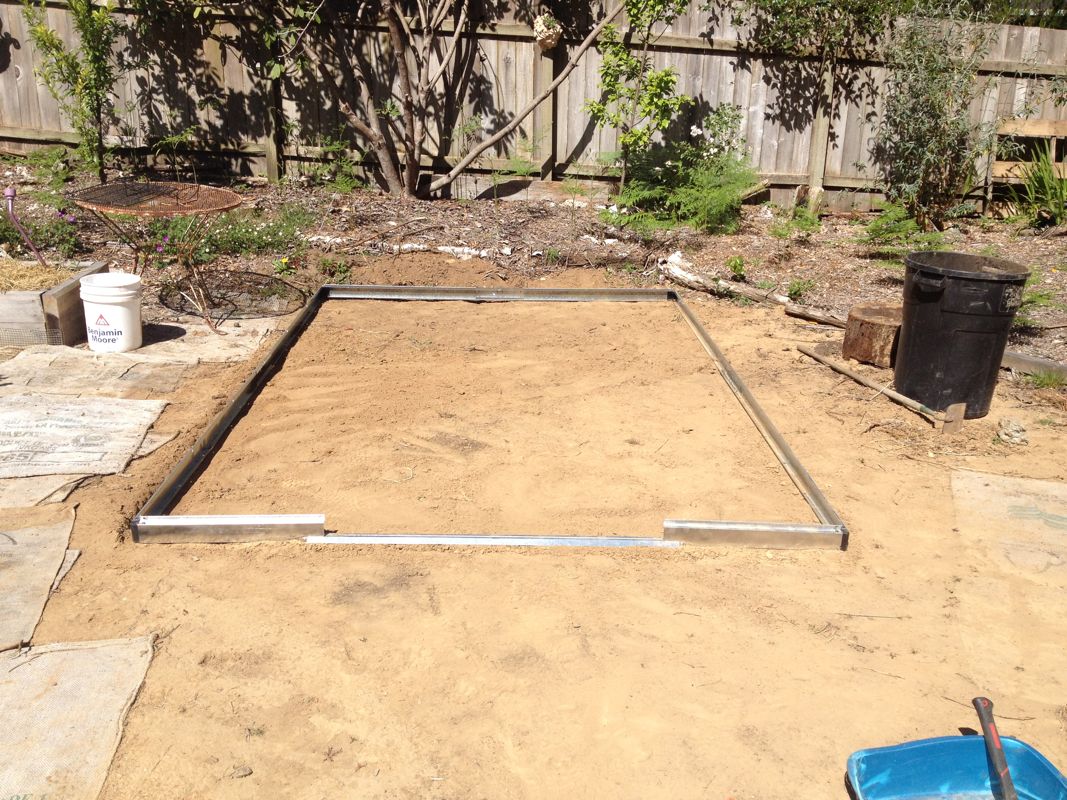
Metal base assembled
This base didn’t take long to put together, but it took me quite a while to get it close to level. This was definitely a moment when my building experience came in handy, because I was able to make a fair guess of how level was “level enough.” I knew I wasn’t going to get it perfect without a concrete base, so I contented myself with digging into the dirt in some spots and filling in others. There was no way for me to be absolutely sure that I’d leveled it well enough, except for to put the rest of the greenhouse up and see if I ran into any problems. Happily, it all came together relatively easily (if not quickly). I did adjust one low corner (the near right corner in the above picture) a few times, but leveling didn’t turn out to be a big problem in general.
This made me grateful for having worked with Dan and Sean, who always say that putting in the time and effort to start a project out right will save a ton of work down the road. If I’d had to disassemble any part of the greenhouse and start over because it wasn’t level enough, I would have wasted hours of labor.
With the base ready, I had nowhere to go but up.
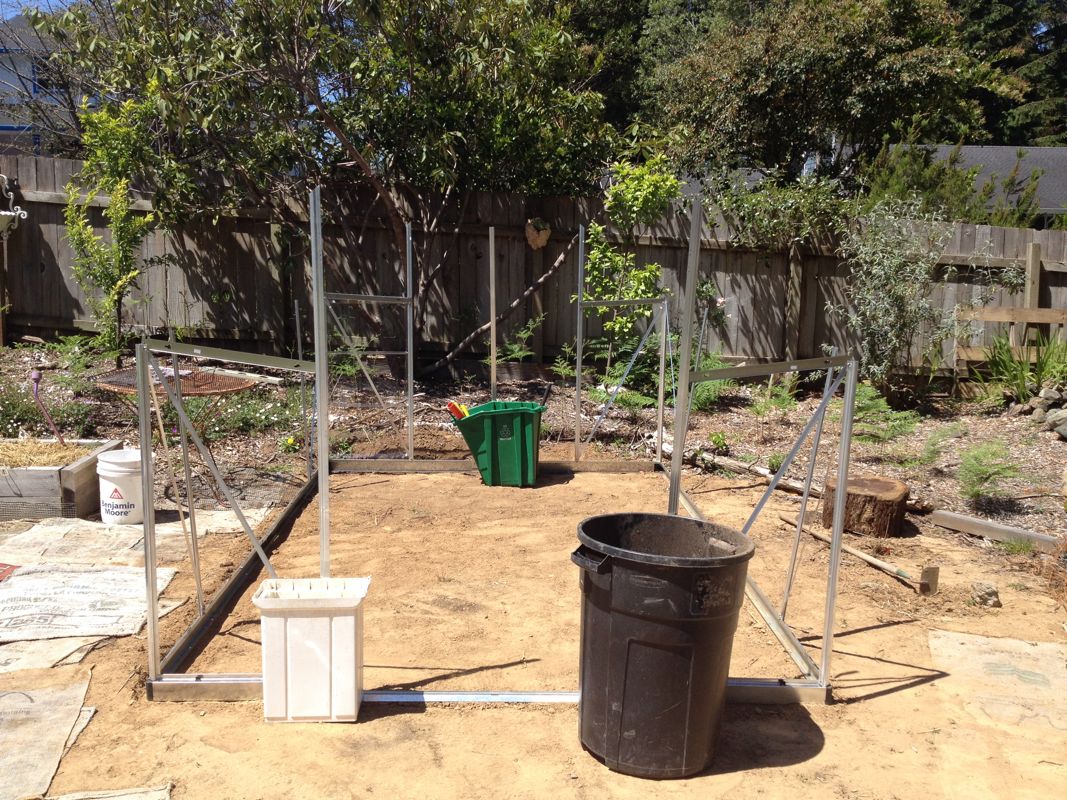
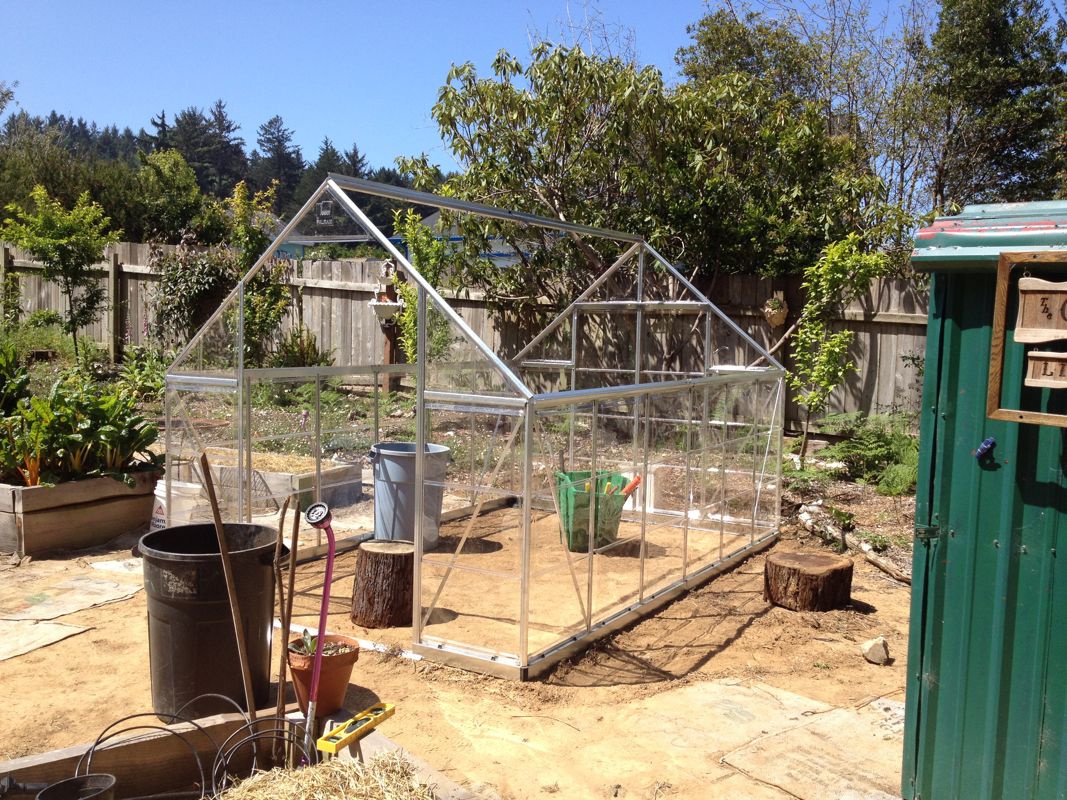
First level of framing
This greenhouse was designed to be assembled by a two-person team, but I challenged myself to do it solo. It definitely would have saved me some time to have a partner, and there were a few moments I wasn’t sure if I’d be able to accomplish the next step by myself, but each time I found a way to make it work. Palram’s sturdy design and clear instructions really helped me stay on track and do everything the right way. They even included a special tool to tighten the nuts that hold the majority of the frame together, which was way easier to use than a wrench would have been.
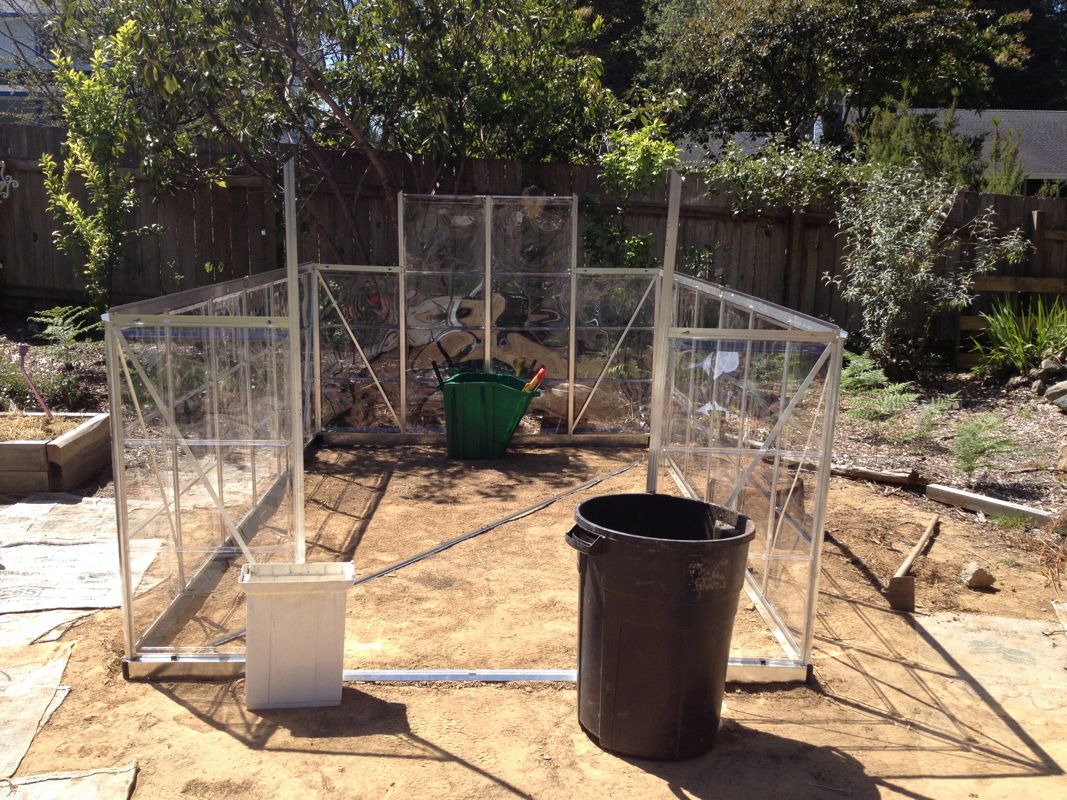
First rows of panels in (end of day one)
Roof framing complete
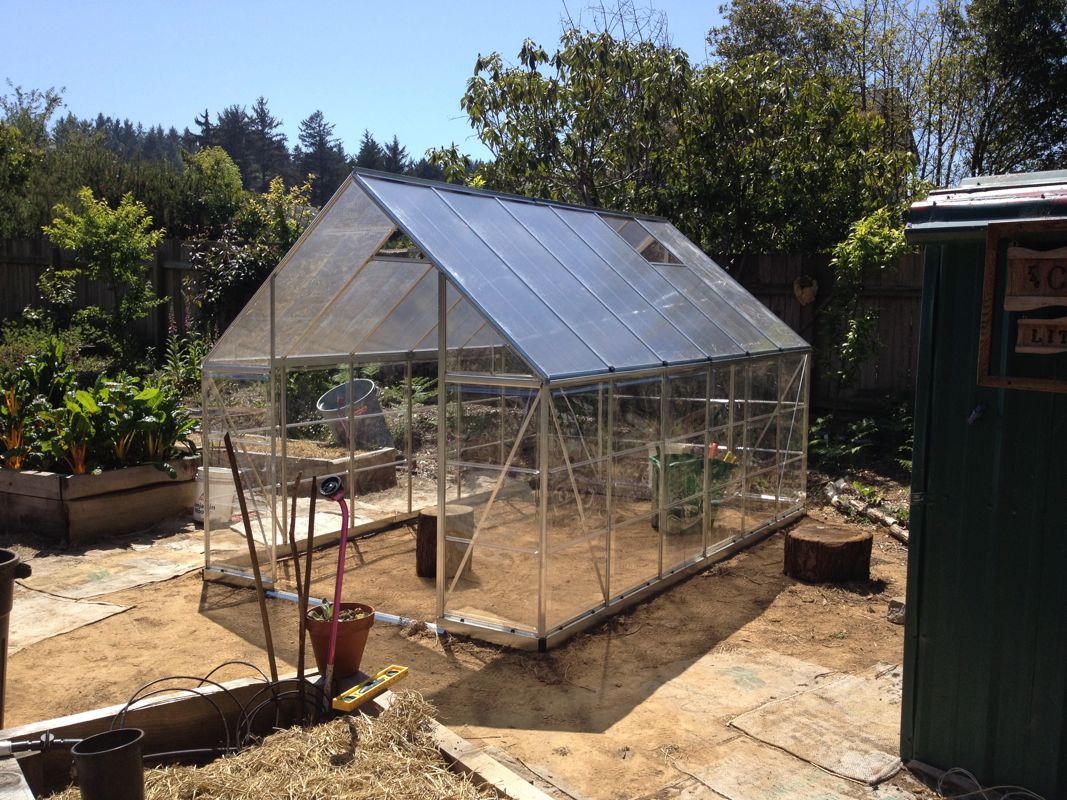
Roof panels inserted and secured, with spaces left for air vents (end of day two)
After finishing the frame, walls, and roof, I had to put the air vents together and install them.
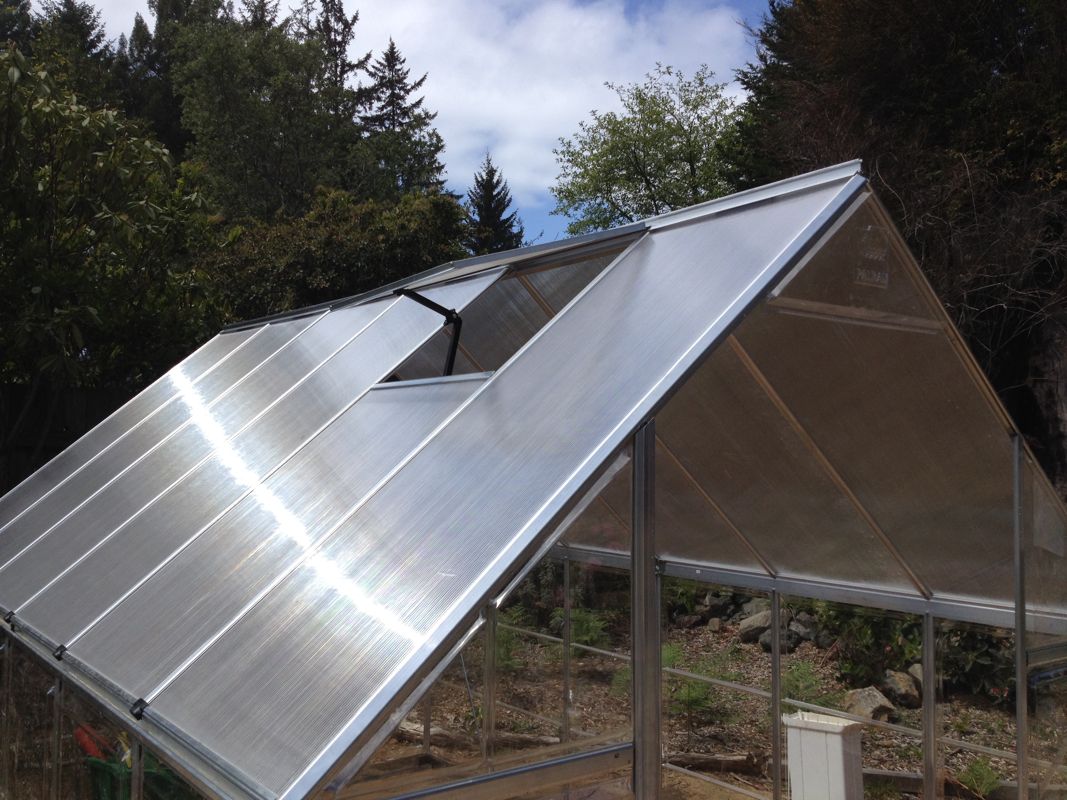
Vent #1 installed

Vent #2 installed (end of day three)
Last thing was the doors.
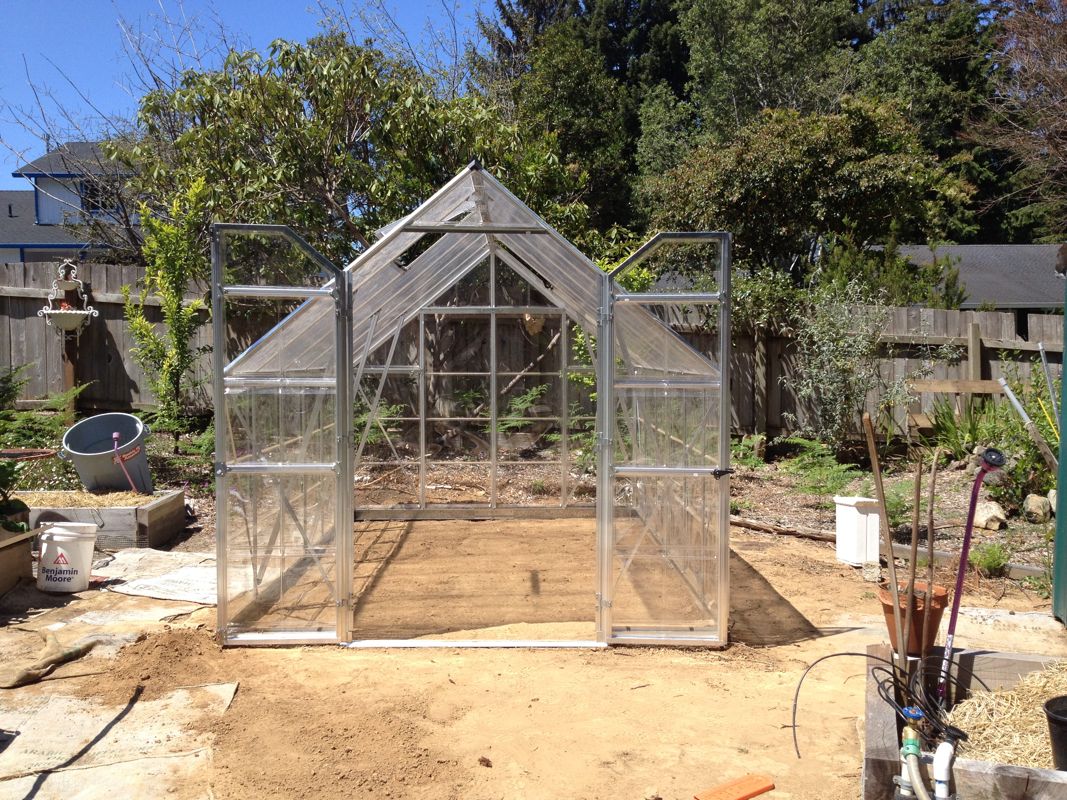
Doors open
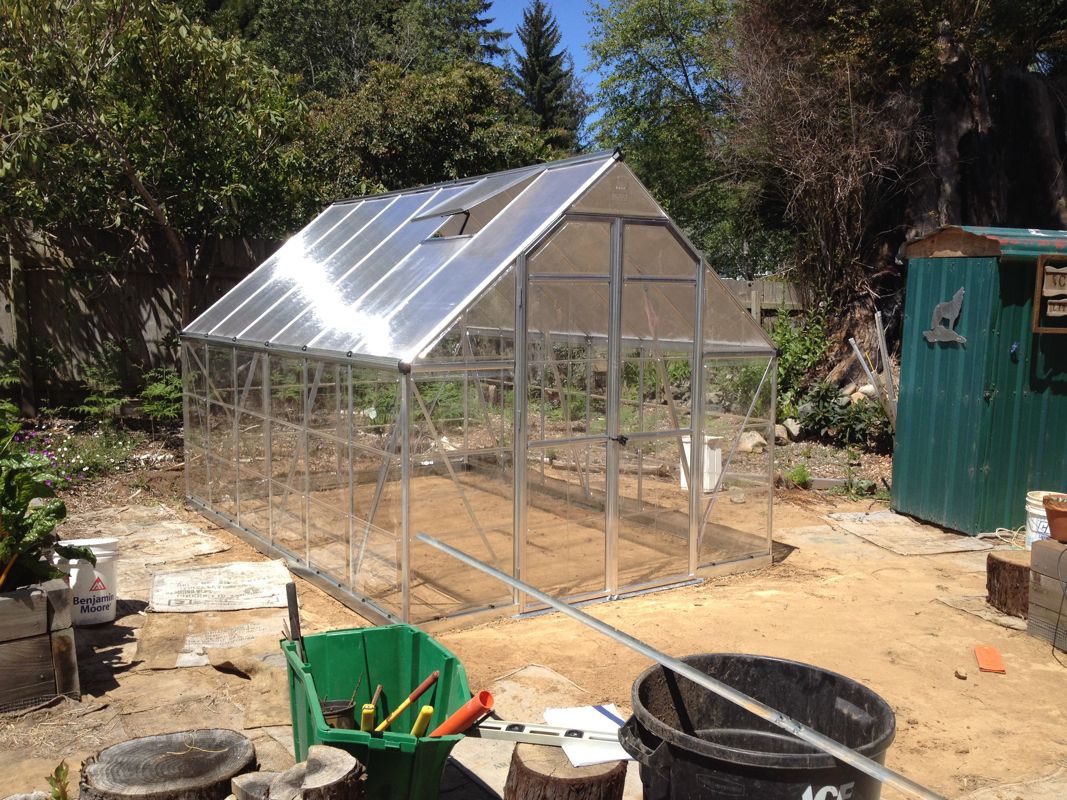
Doors shut (end of day four)
Although I’m not entirely sure this is necessary, Ma and I decided to order Palram’s grounding kit, which will secure the greenhouse to the ground and hopefully keep it safe from wind damage if a big storm comes. It was a little extra money, but not much in exchange for protecting our investment of time and money. I’ll install the grounding kit the week after next, after my backpacking trip to the Lost Coast.
All in all, I’m thrilled with how everything turned out. Assembly took me about 25 hours over four days, but probably could have gone a lot faster. I’m a slow builder, mostly because I’m wary of making mistakes; Dan and Sean taught me that mistakes made while rushing often result in more labor in the long run. Even though I did my best not to miss anything, I still slipped up once: On my third day, I discovered that I’d forgotten to install the piece of framing that serves as a header for the double doors, but fortunately it was a piece that was easy to put in after the fact. Very lucky, although the assembly process seemed designed to alert users to mistakes before they’d gone too far (i.e. you typically wouldn’t be able to complete the next step or two if the previous one wasn’t done correctly).
I didn’t finish quite in time for Mother’s Day, but I was still able to send Ma––who is vacationing back East–– pictures of the completed greenhouse a couple days late. I can’t wait for her to get home so we can set up the inside and start growing more food in there!
Next stop, water catchment.