Journal #17: Flow Control
by Miles Raymer
Following up on my last journal, I’m now thrilled to call myself the proud owner of a fully functioning, timer-controlled drip irrigation system. This system covers all ten of our main beds––five in the old garden as well as the five new beds I’ve constructed since returning from Japan. I’ve held off on running lines into two of the beds that aren’t fully planted yet, but the remaining eight are all fitted with 1/2″ main lines that feed into multiple 1/2 gallon/hour soaker hoses. Our narrow beds have two of these hoses each running the full length of the bed, and the wider beds have three. The soaker hoses are very narrow (1/4″), so they are easy to install; they have drip points every 12″ along the hose. For increased control and efficiency, I also fitted each 1/2″ line with its own shutoff valve, which will enable me to cut off water flow to any bed I don’t want to irrigate while still using the system to irrigate the other beds.
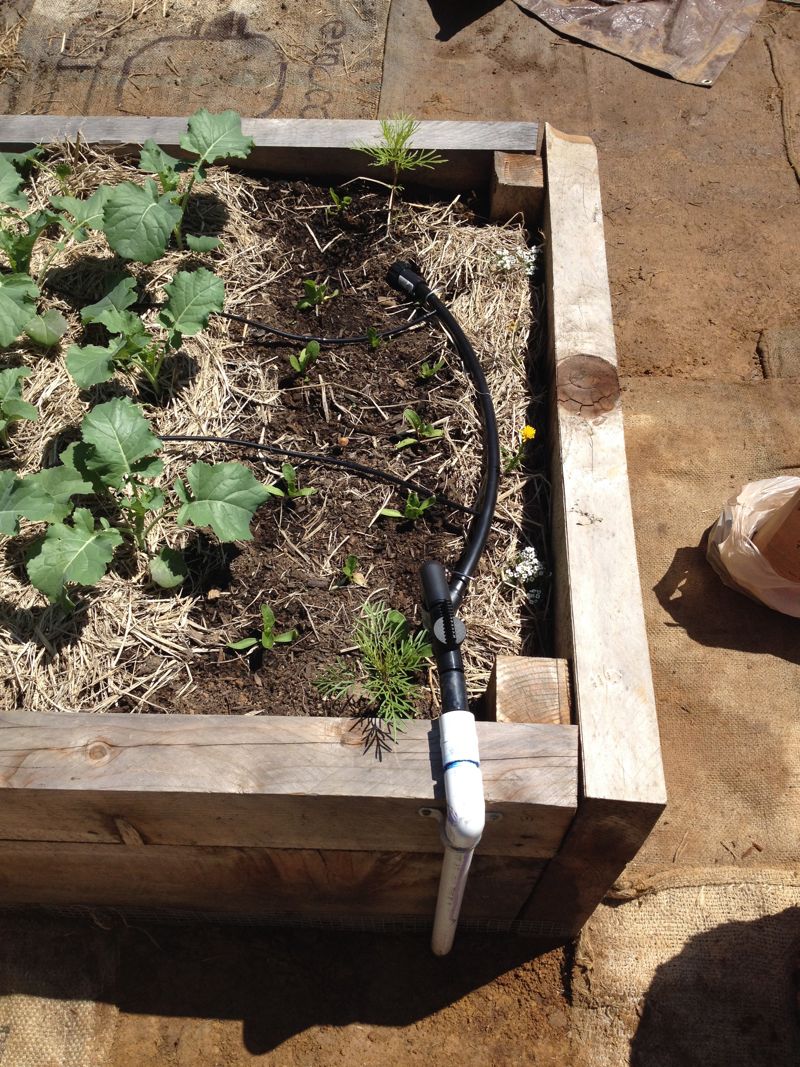
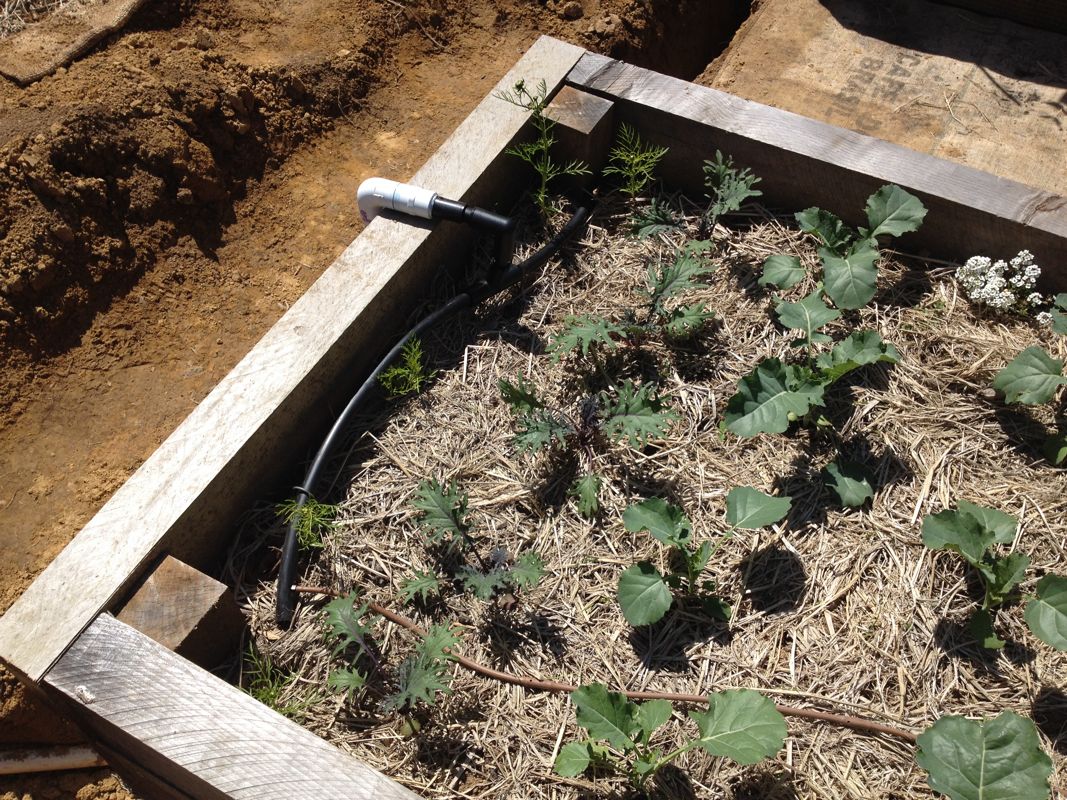
This picture shows the 3/4″ pvc line coming up from the ground, which links to the bed’s shutoff valve before extending to the 1/2″ irrigation line, with 1/4″ soaker hoses connected
This type of drip irrigation is desirable for many reasons, the most important of which to boost the efficiency of our water use. Unlike hand watering, which typically covers a whole bed with an even layer of water, drip irrigation only waters the top of the soil wherever there is a drip point in the soaker hose (in this case every 12″). At first glace, it would seem that this method would only provide water to plants that happen to be near a drip point. However, Randy from Earth Care Landscaping explained to me that the water actually spreads out beneath the top layers of soil, watering the plants evenly (it also comes with the added bonus of not watering as many weeds on the bed’s surface). This uses the water more efficiently, mainly because it minimizes evaporation and also doesn’t require as much water as a normal hose, which typically goes through about 1 gallon/minute. I’m sure it will take me a while to figure out exactly how many soakers I need for each bed to get watered evenly, and thankfully it’s very easy to install additional soakers once the 1/2″ line is already set up at the bed’s edge. Randy advised that I start off with the smallest number of soakers that seems reasonable, and then work up from there if some plants aren’t getting enough water.
Although I dug the trenches, filled them in, and ran the irrigation lines in each of the beds, I simply couldn’t have set this system up on my own. I owe many thanks to Randy and Pedro from Earth Care Landscaping. They did an excellent job placing the 1″ and 3/4″ water lines in the trenches, and they also hooked the whole system up to a electronic timer that gives me total control of the system by just pressing a few buttons. Here are some pictures of Randy and Pedro’s fine work:

Here you can see the 1″ and 3/4″ lines inside the open trench (top), as well as the access point for the new garden station (there is a second control point in the old garden)
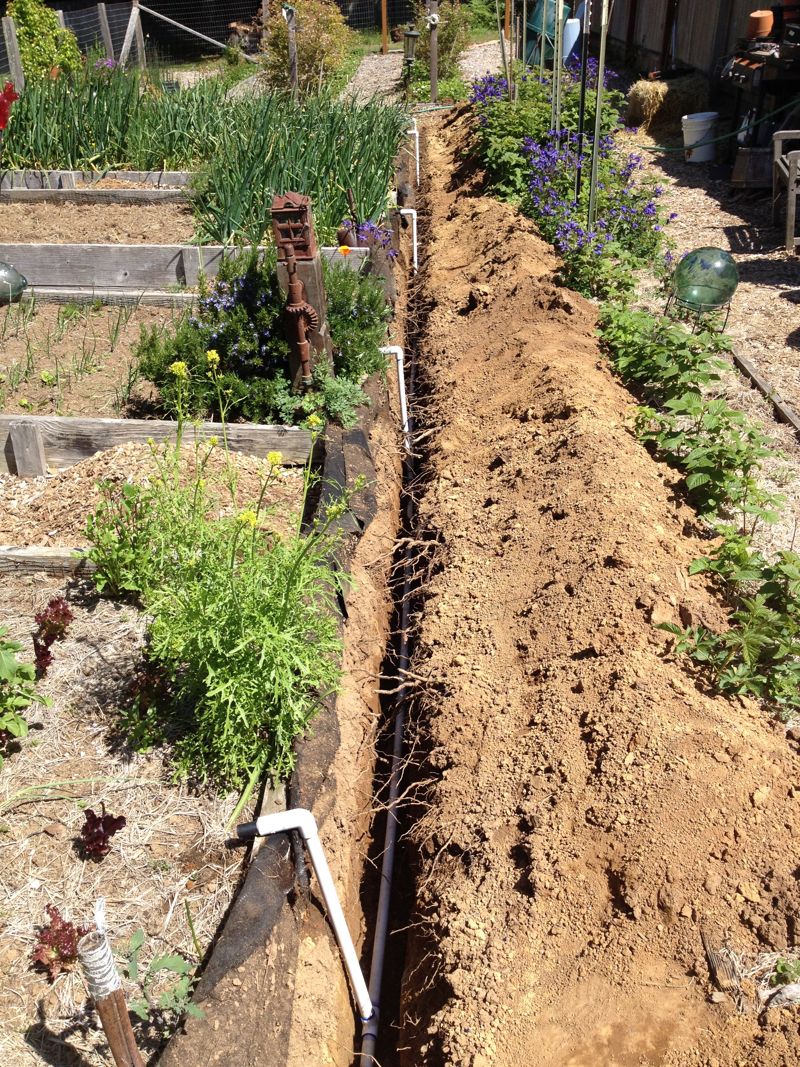
Here is the open trench in the old garden, with 3/4″ lines feeding into each bed
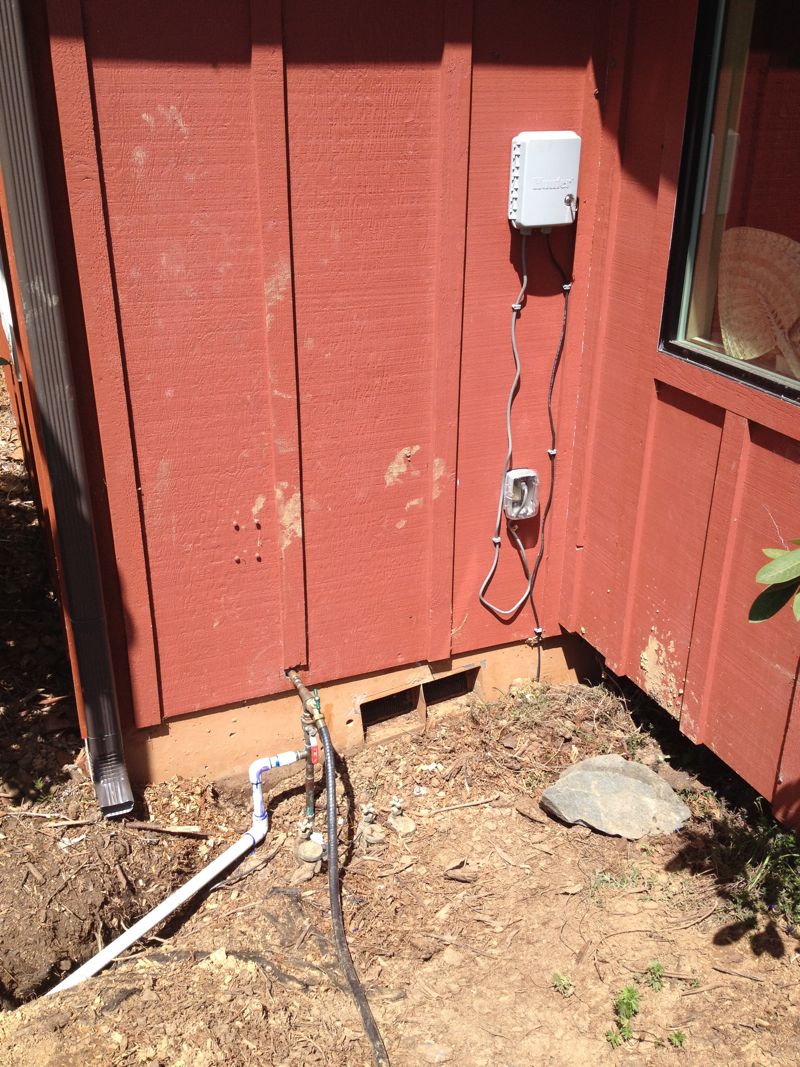
This is where the water goes from the house out to the garden, now fitted with the electronic control panel for the whole system
Randy connected the 1/2″ hose and ran the first soaker through this bed to demonstrate how to set it up (I later added a shutoff valve and end caps for the 1/2″ hose). After seeing this useful demonstration, I could do the remaining beds myself.
When Randy and Pedro were finished with their part of the job, I filled in the trenches and got to work. It only took me a couple days to set up the rest of the system on my own. Ma and I had to spend nearly $300 on all the materials, but almost all of the individual parts are reusable, so we figured it was a good investment. I really enjoyed the process of setting up each bed and making sure the soakers were evenly spaced. Once I got the soakers in the precise spots I wanted them, I used metal anchor pins to keep them in place. It was like putting a simple and very useful puzzle together. Finally, I affixed the pipes to the sides of the beds with pipe straps; this makes it much harder to break the pipes by accidentally kicking them or running into them with the wheelbarrow. I also the covered the exposed 3/4″ pvc pipes with protective foam:
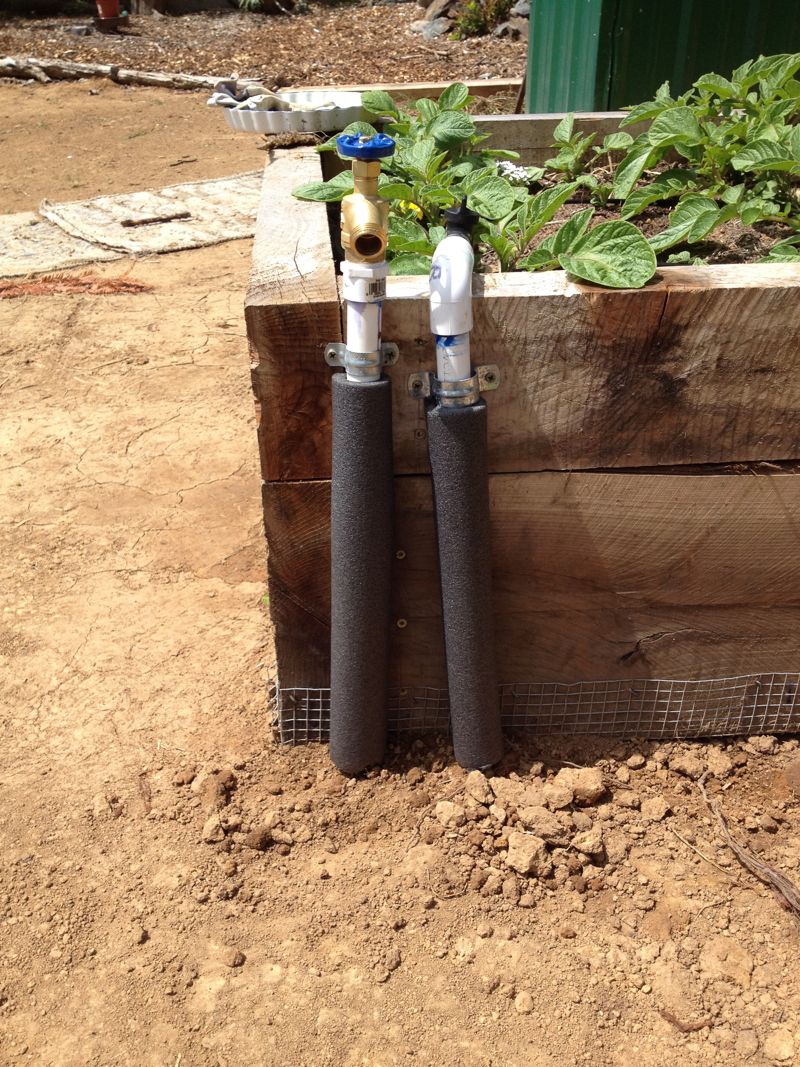
This insulation shields the pvc from degradation caused by UV radiation, increasing the pipe’s lifespan
It would definitely have been easier to run the soakers through beds that weren’t already well on their way to full production, but now that the system is in place, it will be easy to set it up next season when all the plants are still small. After spending some time figuring out how to use the control panel, I can now set the two garden stations to water themselves whenever I need them to. This will save an enormous amount of time and water in the coming dry months.
The garden has really started to take off in recent weeks, and Ma and I are doing everything we can to keep up. It’s really rewarding to help so many living things thrive, and thus far we haven’t lost plants in any significant numbers. I go slug-hunting for a few minutes every morning shortly after first light, and usually manage to find a few of them before they do too much damage. If I find native banana slugs, I move them far away from the garden. Otherwise, I kill them. Fortunately, most of our greens have already grown past the point where slugs are a major threat. So far, so good.

The first bed of the season is now producing more greens than we know what to do with––multiple varieties of spinach, kale, and lettuce––and more on the way!
I am blessed to spend these days surrounded by increasing abundance and fertility. Spring is a lovely time of year.
Looking good Miles! Wanna come over and see what’s happening here?
Would love to. Am out of town this weekend, but I’ll come visit sometime soon. When would be good for you?
[...] project, along with the irrigation work I’ve done for the new garden, has lifted the veil somewhat on the basic materials and [...]